![sonicwall.jpg]](https://kb.mspcentric.io/hs-fs/hubfs/sonicwall.jpg?height=36&name=sonicwall.jpg)
Setup
We will cover how to completely set up a Role, Agent, and application with all the permissions needed for billing and for alerts. We will outline below Alert specific permissions.
Create Role
Roles can be accessed by navigating to Configurations > Teams and Agents > Roles. You can create a new Role called whatever you wish, for example MSPCentric.
Press save.
Go to the permissions tab, and give the following permissions:
-
Clients Access Level - Read Only
-
Items Access Level - Read and Modify
-
Invoices Access Level - Read, Create and Modify
-
Client Contracts Access Level - Read and Modify
-
Tickets Access Level - Read and Modify
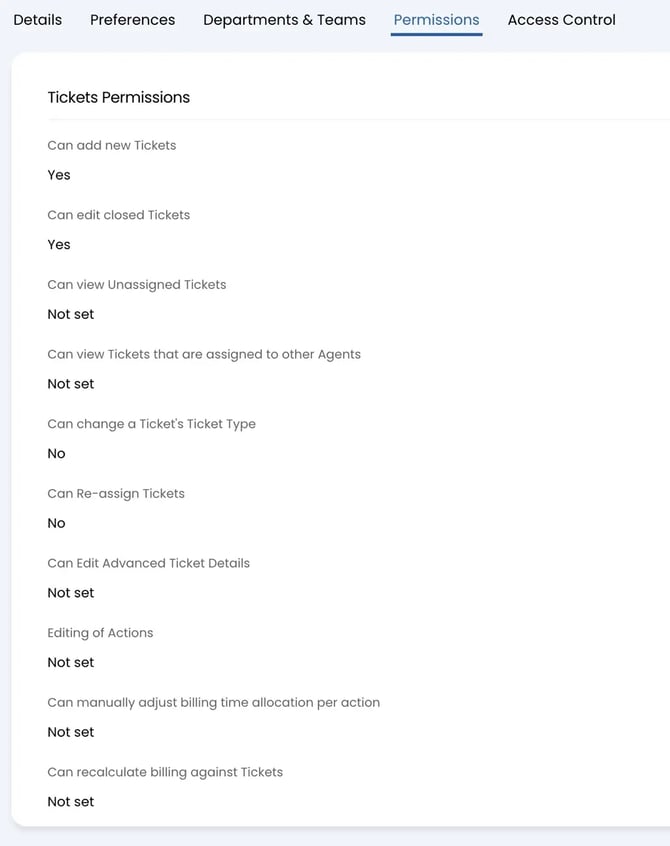
Navigate down the permissions tab to Ticket Permissions:
-
Can add new tickets - yes
-
Can edit closed tickets - yes
-
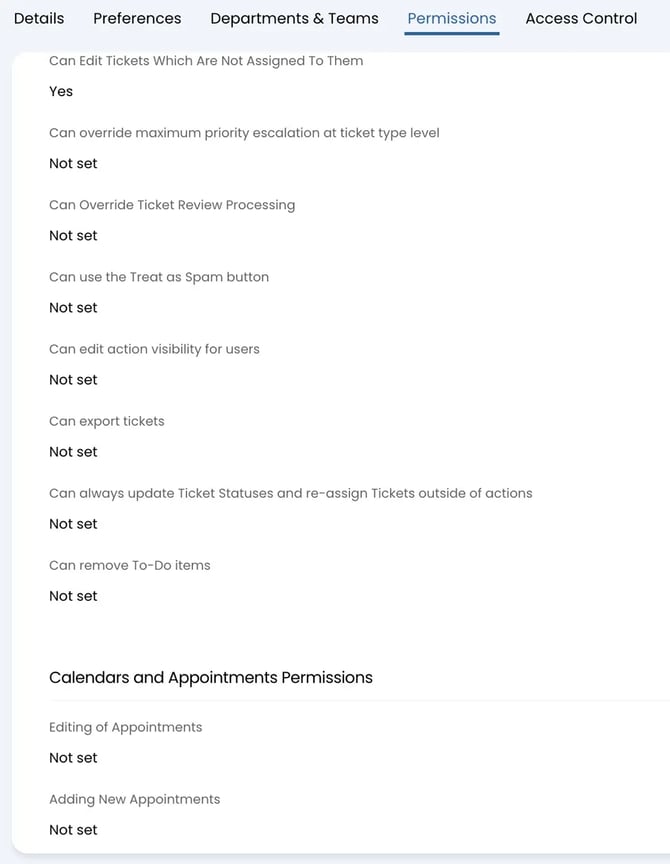
Can edit tickets which are not assigned to them - yes
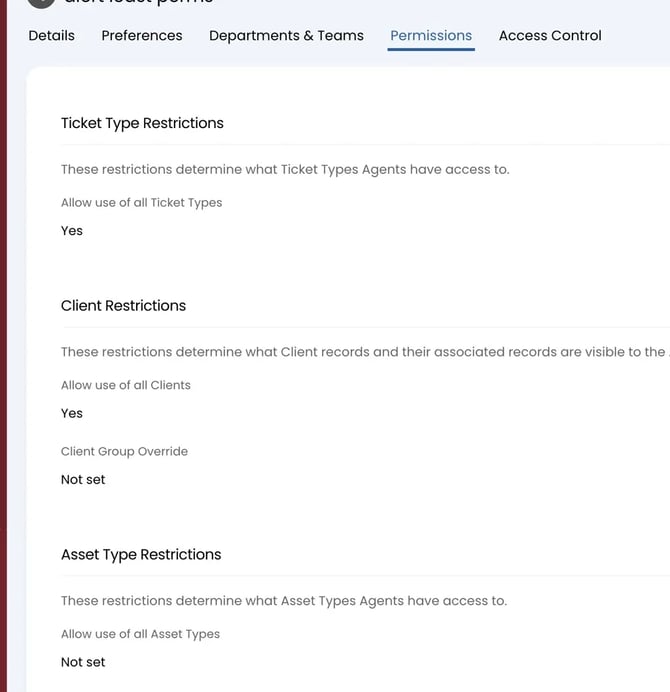
Navigate down to Ticket Type Restrictions:
-
Allow the user of all Ticket Types - yes
Navigate to Client Restrictions:
-
Allow use of all Clients - yes
Save this role, then proceed to creating a new Agent.
Configurate Agent
Navigate back to the Configurations page. Now go to Teams & Agents > Agents.
On this page, we will create a new Agent. Press the New button in the top right.
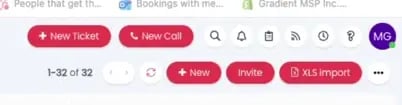
Use the following settings for the Agent:
-
Username will be 'MSPCentric'
-
Select MSPCentric under Roles
-
Select the API-only agent option
-
Default Team can be 'No Default Team'
-
Work hours will be 'Default Working Hours'
Scroll to the bottom and hit save.
Create New Application
Navigate to Configuration > Integrations > HaloPSA API > View Applications.
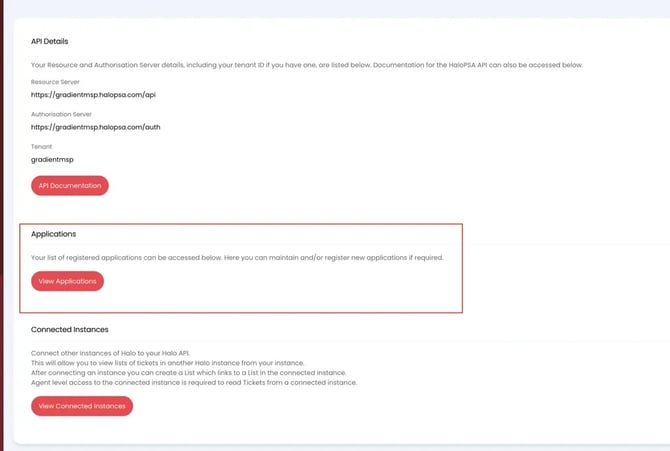
Click New in the top right.
On the Details tab, enter "Application Name" with MSPCentric.
Set the "Authentication Method" to Client ID and Secret (Services).
Copy the Client ID and Client Secret into Gradient.
Set the Login Type to Agent.
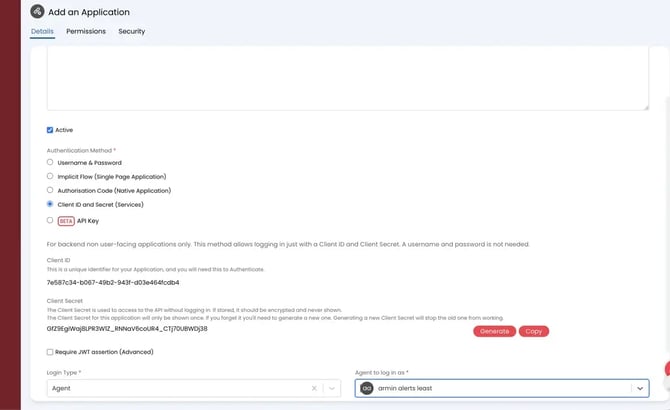
Select an Agent to log in as. This will be "Gradient" as we created the Agent in the earlier step.
Press Save. Press OK if you get a permissions pop-up.
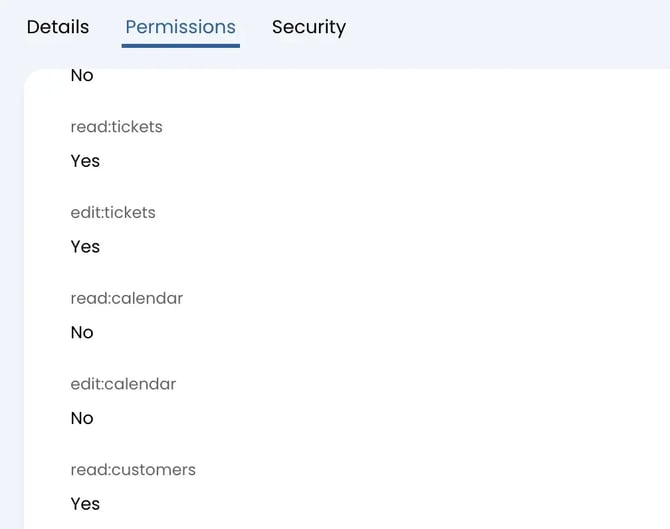
On the Permissions tab, enable the following permissions:
-
read:customers
-
read:contracts
-
edit:contracts
-
read:items
-
edit:items
-
read:invoices
-
edit:invoices
-
read:tickets
-
edit:tickets
Click Save.
Ensure that you save your clientId and clientSecret, and store securely.
Alert Specific Permissions
This section will contain Alerts specific permission
Role
In Roles > Permissions >
-
Feature Access:
-
Ticket Access Level: ‘Read and Modify’
-
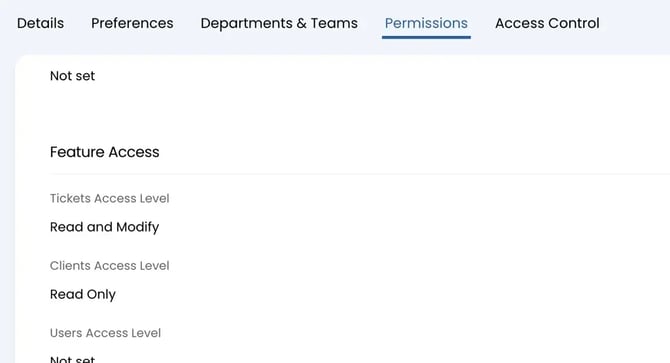
- Ticket Permissions:
- Can add new tickets: ‘yes’
- Can edit closed tickets: ‘yes’
- Can edit tickets which are not assigned to them: ‘yes’
- Can view tickets that are assigned to other Agents: ‘yes’
- Can edit Advanced Ticket Details: ‘yes’
- Can edit tickets which are not assigned to them: ‘yes’
-
Ticket Type Restrictions:
-
Allow use of all Ticket Types: ‘yes’
-
-
Client Restrictions:
-
Allow the user of all Clients: ‘yes’
-
Agent
The Agent that you are using for the integration MUST be assigned to have visibility of the Team or Teams that they are looking to select in the SonicWall app for Alerts. This can be done by manually selecting a Team or Teams to add on Department & Teams tab of that Agents profile(Configuration > Teams & Agents > Agents).
The easiest way to ensure this is to go to Configuration >Integrations > HaloPSA Api > Application, select the Application that you are using, and set All:Teams to Yes.
.png?width=670&height=289&name=image%20(35).png)
Application
When configuring the application permissions, the alert specific permissions required are:
-
read:tickets
-
edit:tickets
-
read:customers
That is everything you will need to configure alerts within HaloPSA.